The Value in Reprocessing Old Milky Way Images
It’s been cloudy here recently, and despite a successful trip out to see the aurora and photograph the Milky Way a week or two back, I haven’t been able to get out as much as I want lately and make new images. So instead, I spent a little time looking through my back catalog of images, and spotted a couple of older images that I thought could use a facelift. Both images are from the same location at Mt. Rainier, and today I wanted to talk through the now and then. Hopefully it will be instructional!
Milky Way processing - and in particular my Milky Way processing - has come a long way in the many years I’ve been shooting it. The techniques and process that I used when these images were first shot isn’t the same as what I’m doing now, and I’d like to think that what I’m shooting now is more evolved and results in better images. Thankfully, I’ve always shot raw images along the way, and so it’s easy to go back to the original and reprocess them with modern techniques. Sometimes the differences are striking.
With that in mind, let’s look at the first example. This is a single image I shot in 2014, on a Canon 6d with a Rokinon 24mm/1.4. This was 20 seconds, f/1.4, and ISO 6400. I was immensely proud of this image when I shot it, and it garnered a strong reaction from friends, family, and fans online. I sold plenty of prints of it, and I even have a giant 24x36” metal print of it in my office. It’s the subject of one of my most popular articles on this site about post-processing a single shot Milky Way photo. I really like the climbers on the mountain, and it turned out that a friend of mine was on the mountain that night, and is probably one of the headlamps ascending the Emmons (she bought a print!). Here’s the image if you haven’t already seen it:
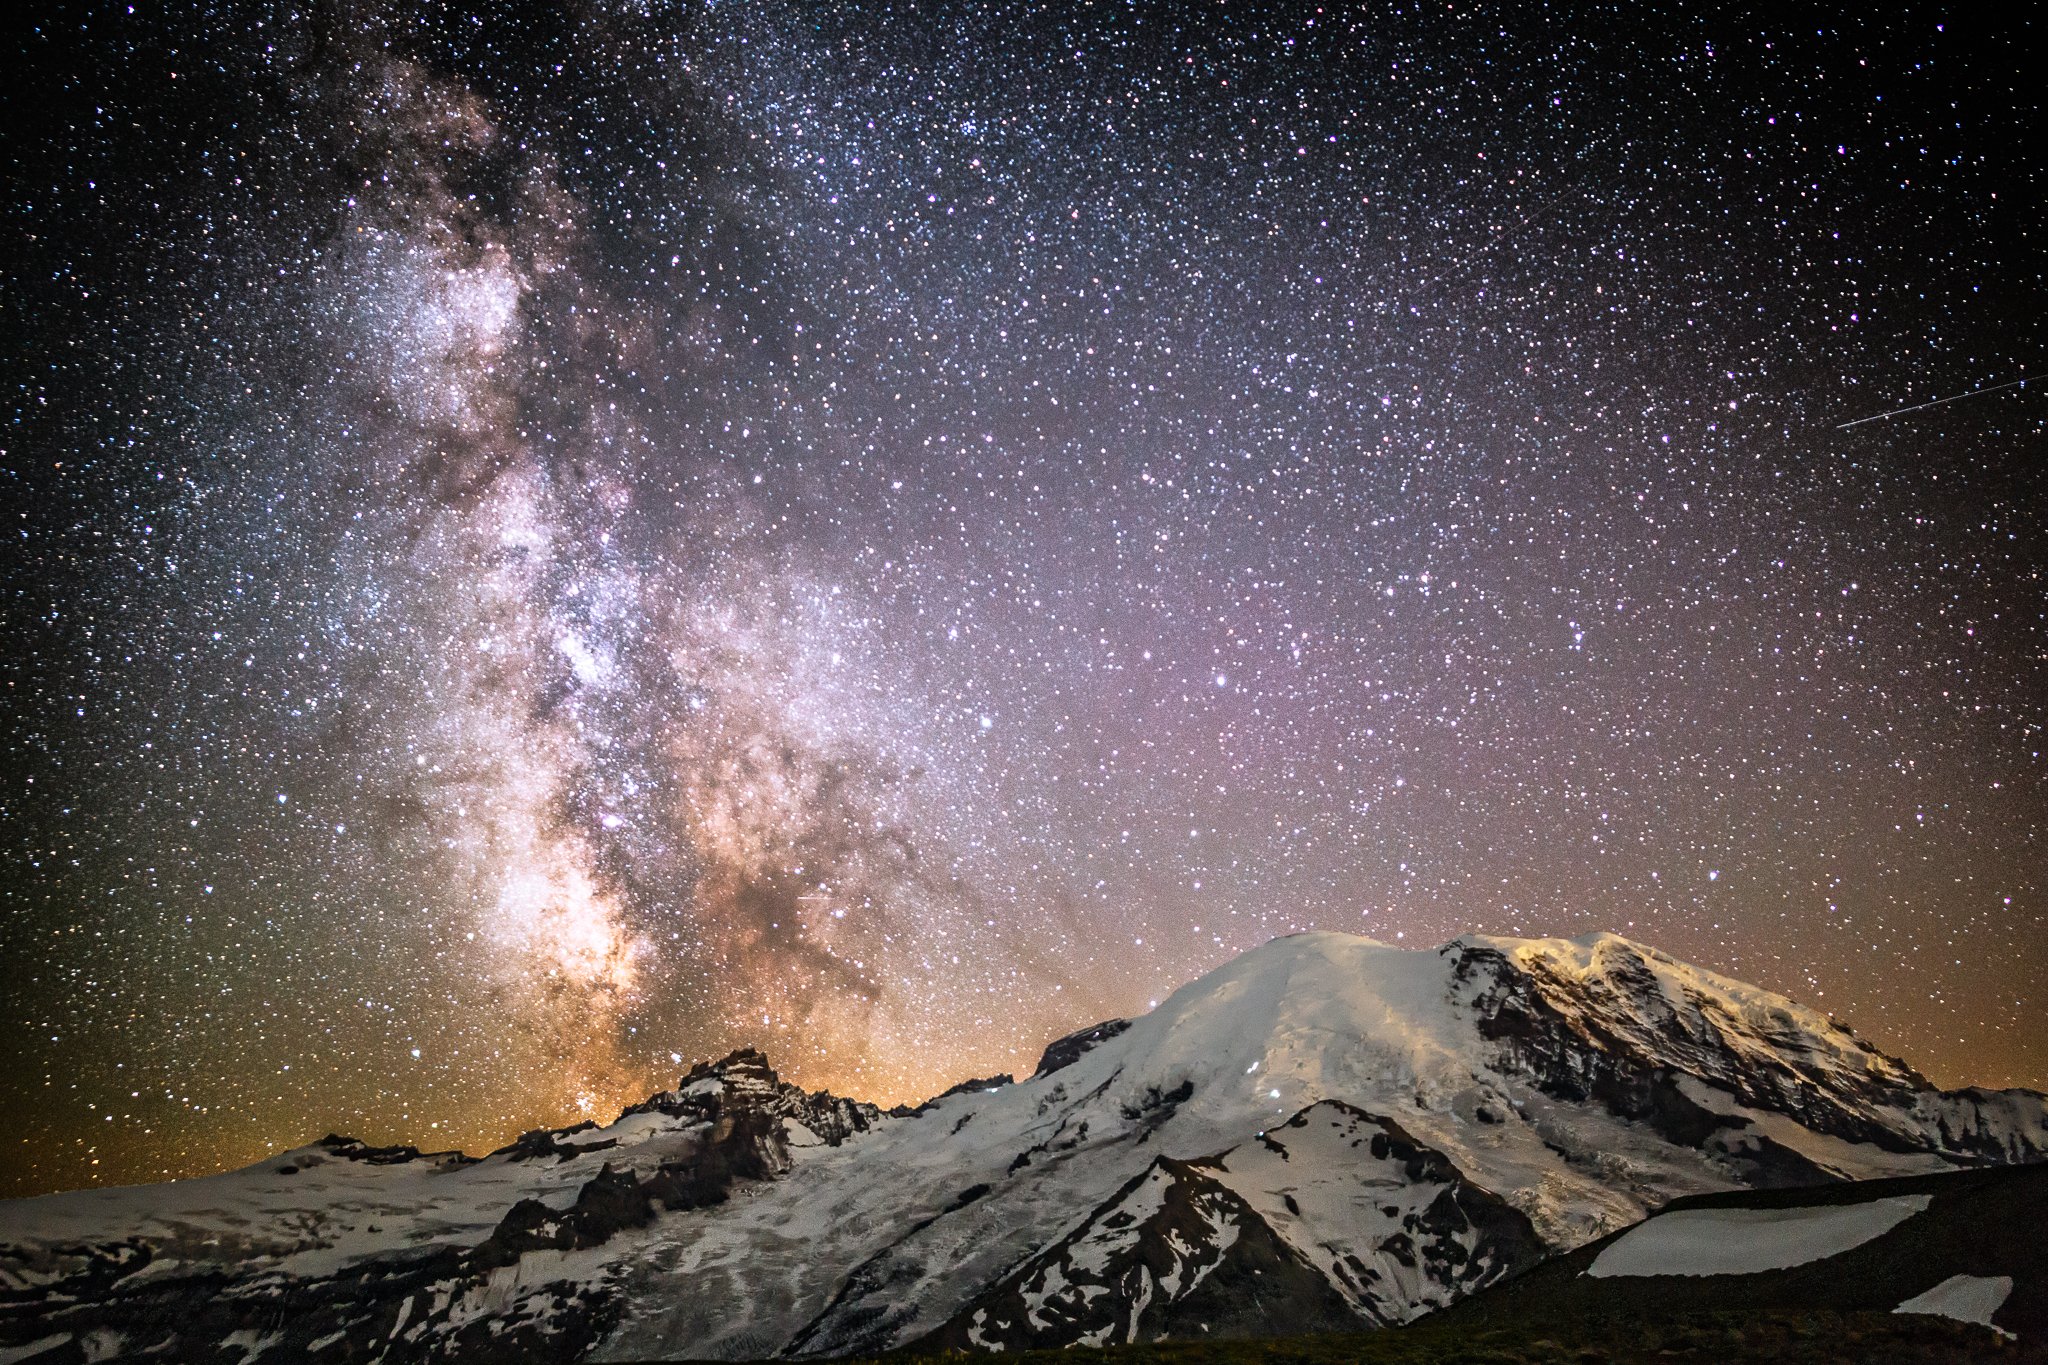
Even today, eight years later, I think it’s still a good image, but it definitely has some flaws. I think the clarity and detail in the mountain is a little overcooked. The stars are somewhat soft, although this is mostly a result of the lens I was using. The color in the sky is interesting, but I think it’s a little too unnatural for my current tastes. There generally isn’t that much pink and orange in the sky. I also think that visually, there’s just a lot going on in the image - there are SO MANY stars, and yes there really are that many stars, but they are almost distracting and it’s a little hard to know what to focus on.
With that, I reprocessed this image, and here’s the result. I actually reprocessed this image for my Milky Way photography book, but made a couple of ever so slight tweaks in the spirit of this article.
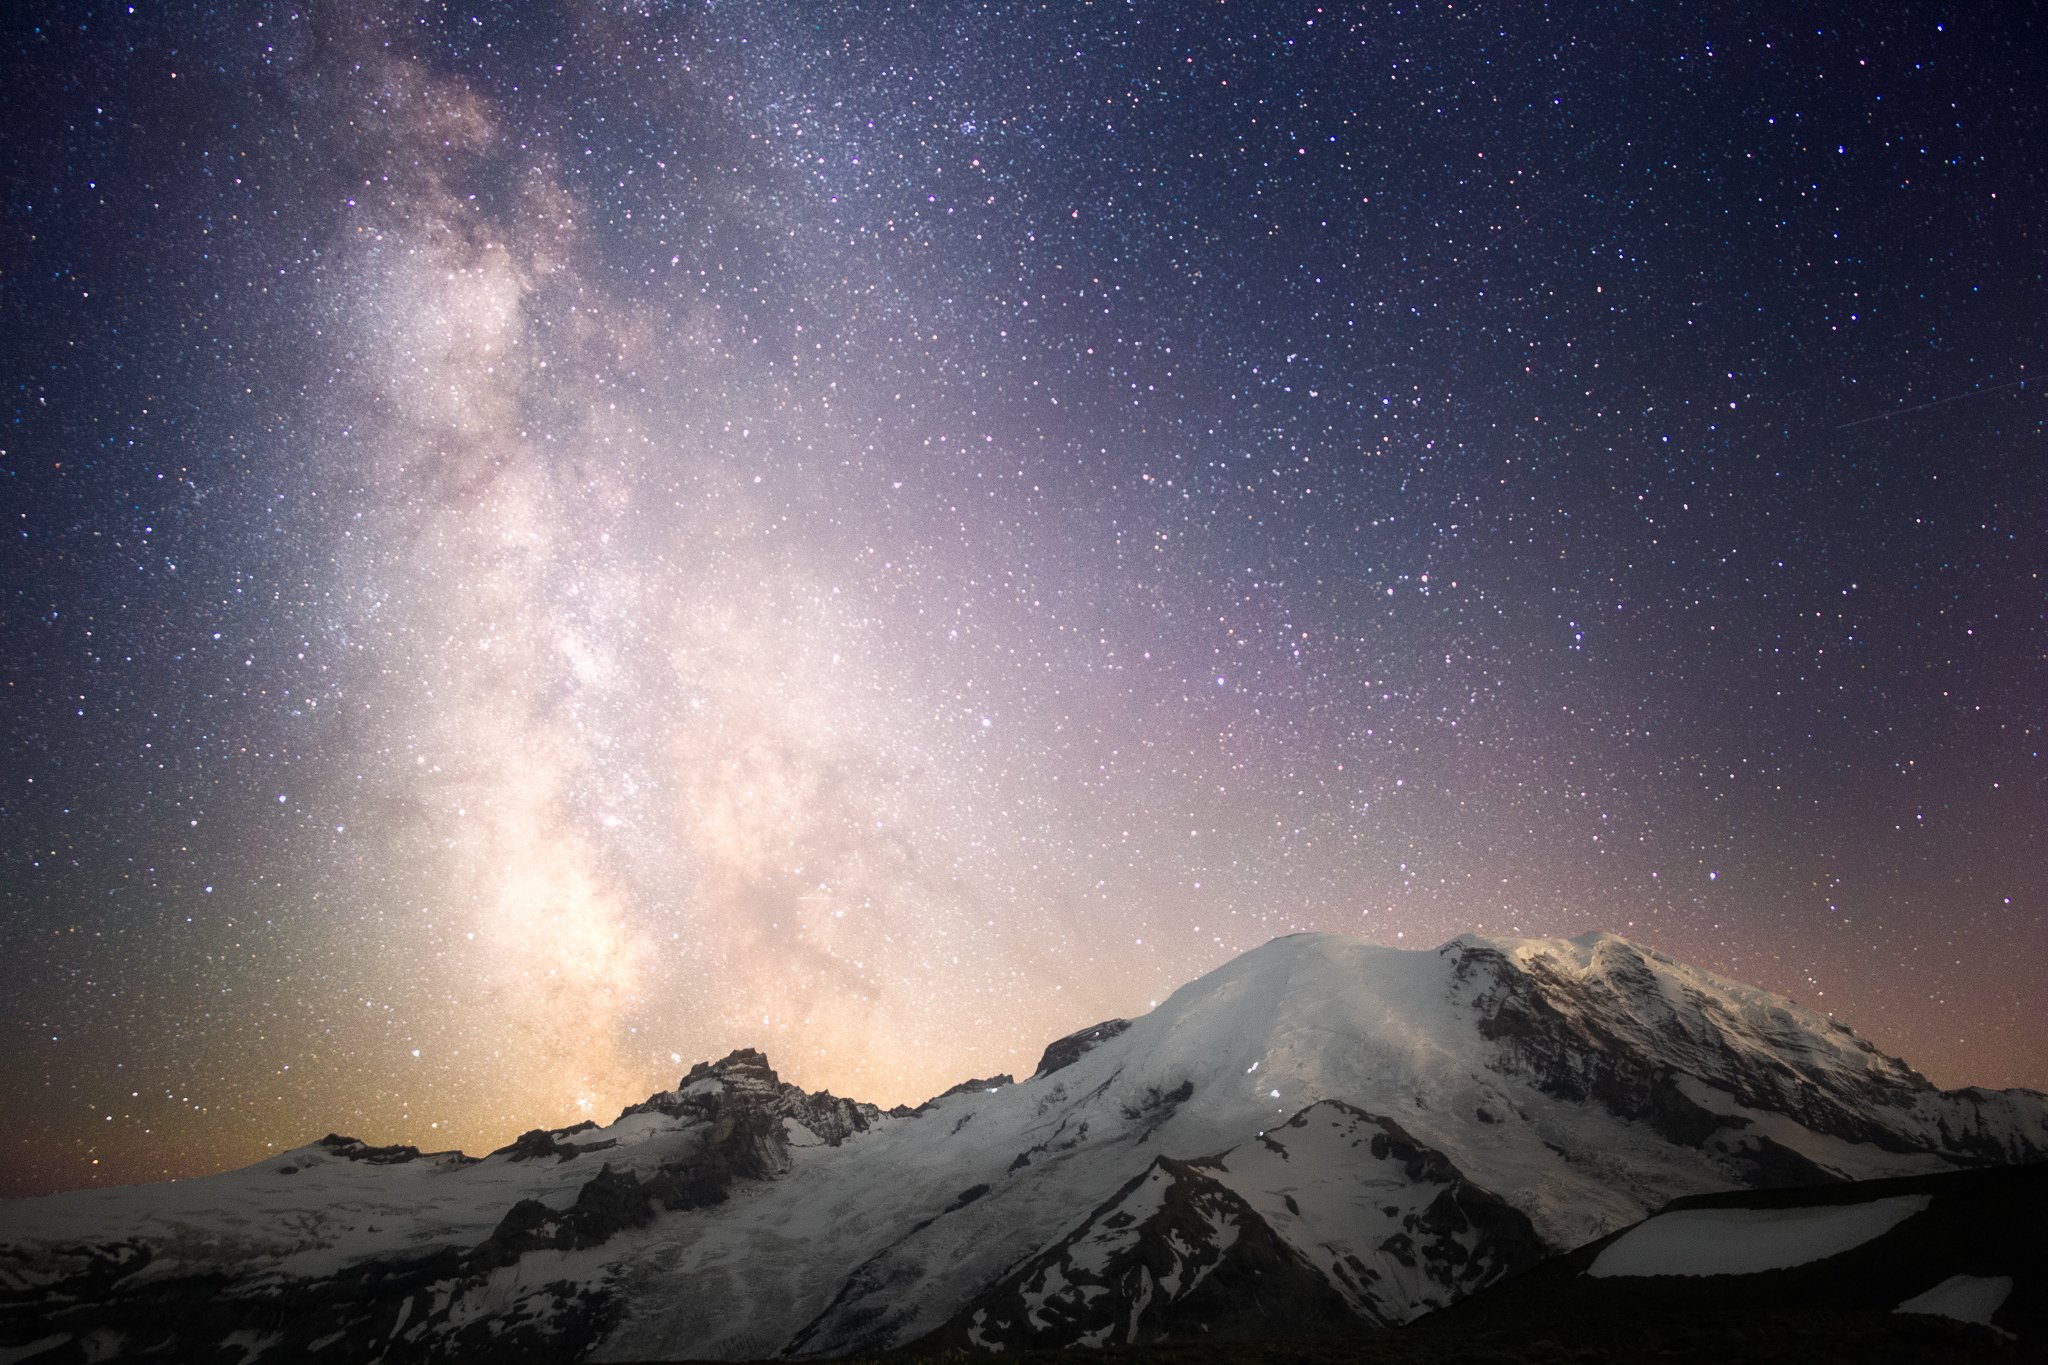
Remember, this is the same raw image, but a vastly different result. I like this version much better. The mountain looks much more natural, like it does when you are actually standing there on Burroughs Mountain. I’ve done some star reduction to eliminate some of the visual clutter the mass of stars in the original created. That also helped with some of the softness in the stars in the original. But maybe most importantly, I’ve altered the colors and the processing to be more “true to life”. Of course, the Milky Way doesn’t look like this to the naked eye, as your eye can’t really see the color. But here, I’ve tried to faithfully recreate what it really looks like in the back of the camera, at least to my eye anyway. I hope you’ll agree that it’s much better!
Let’s move on to the second image. This image was shot in nearly the same spot, and almost the same time of year, but in 2018, so 4 years later. In the ensuing years, I had made some equipment upgrades. I was still shooting with the 6d, but had upgraded to the EF 16-35/f2.8 L III, and had brought along a tracking mount. The sky in this image is tracked and there is a significant upgrade in quality as a result. The foreground is a blue hour blend, and I focus stacked it to ensure strong focus from front to back. Here’s the image:
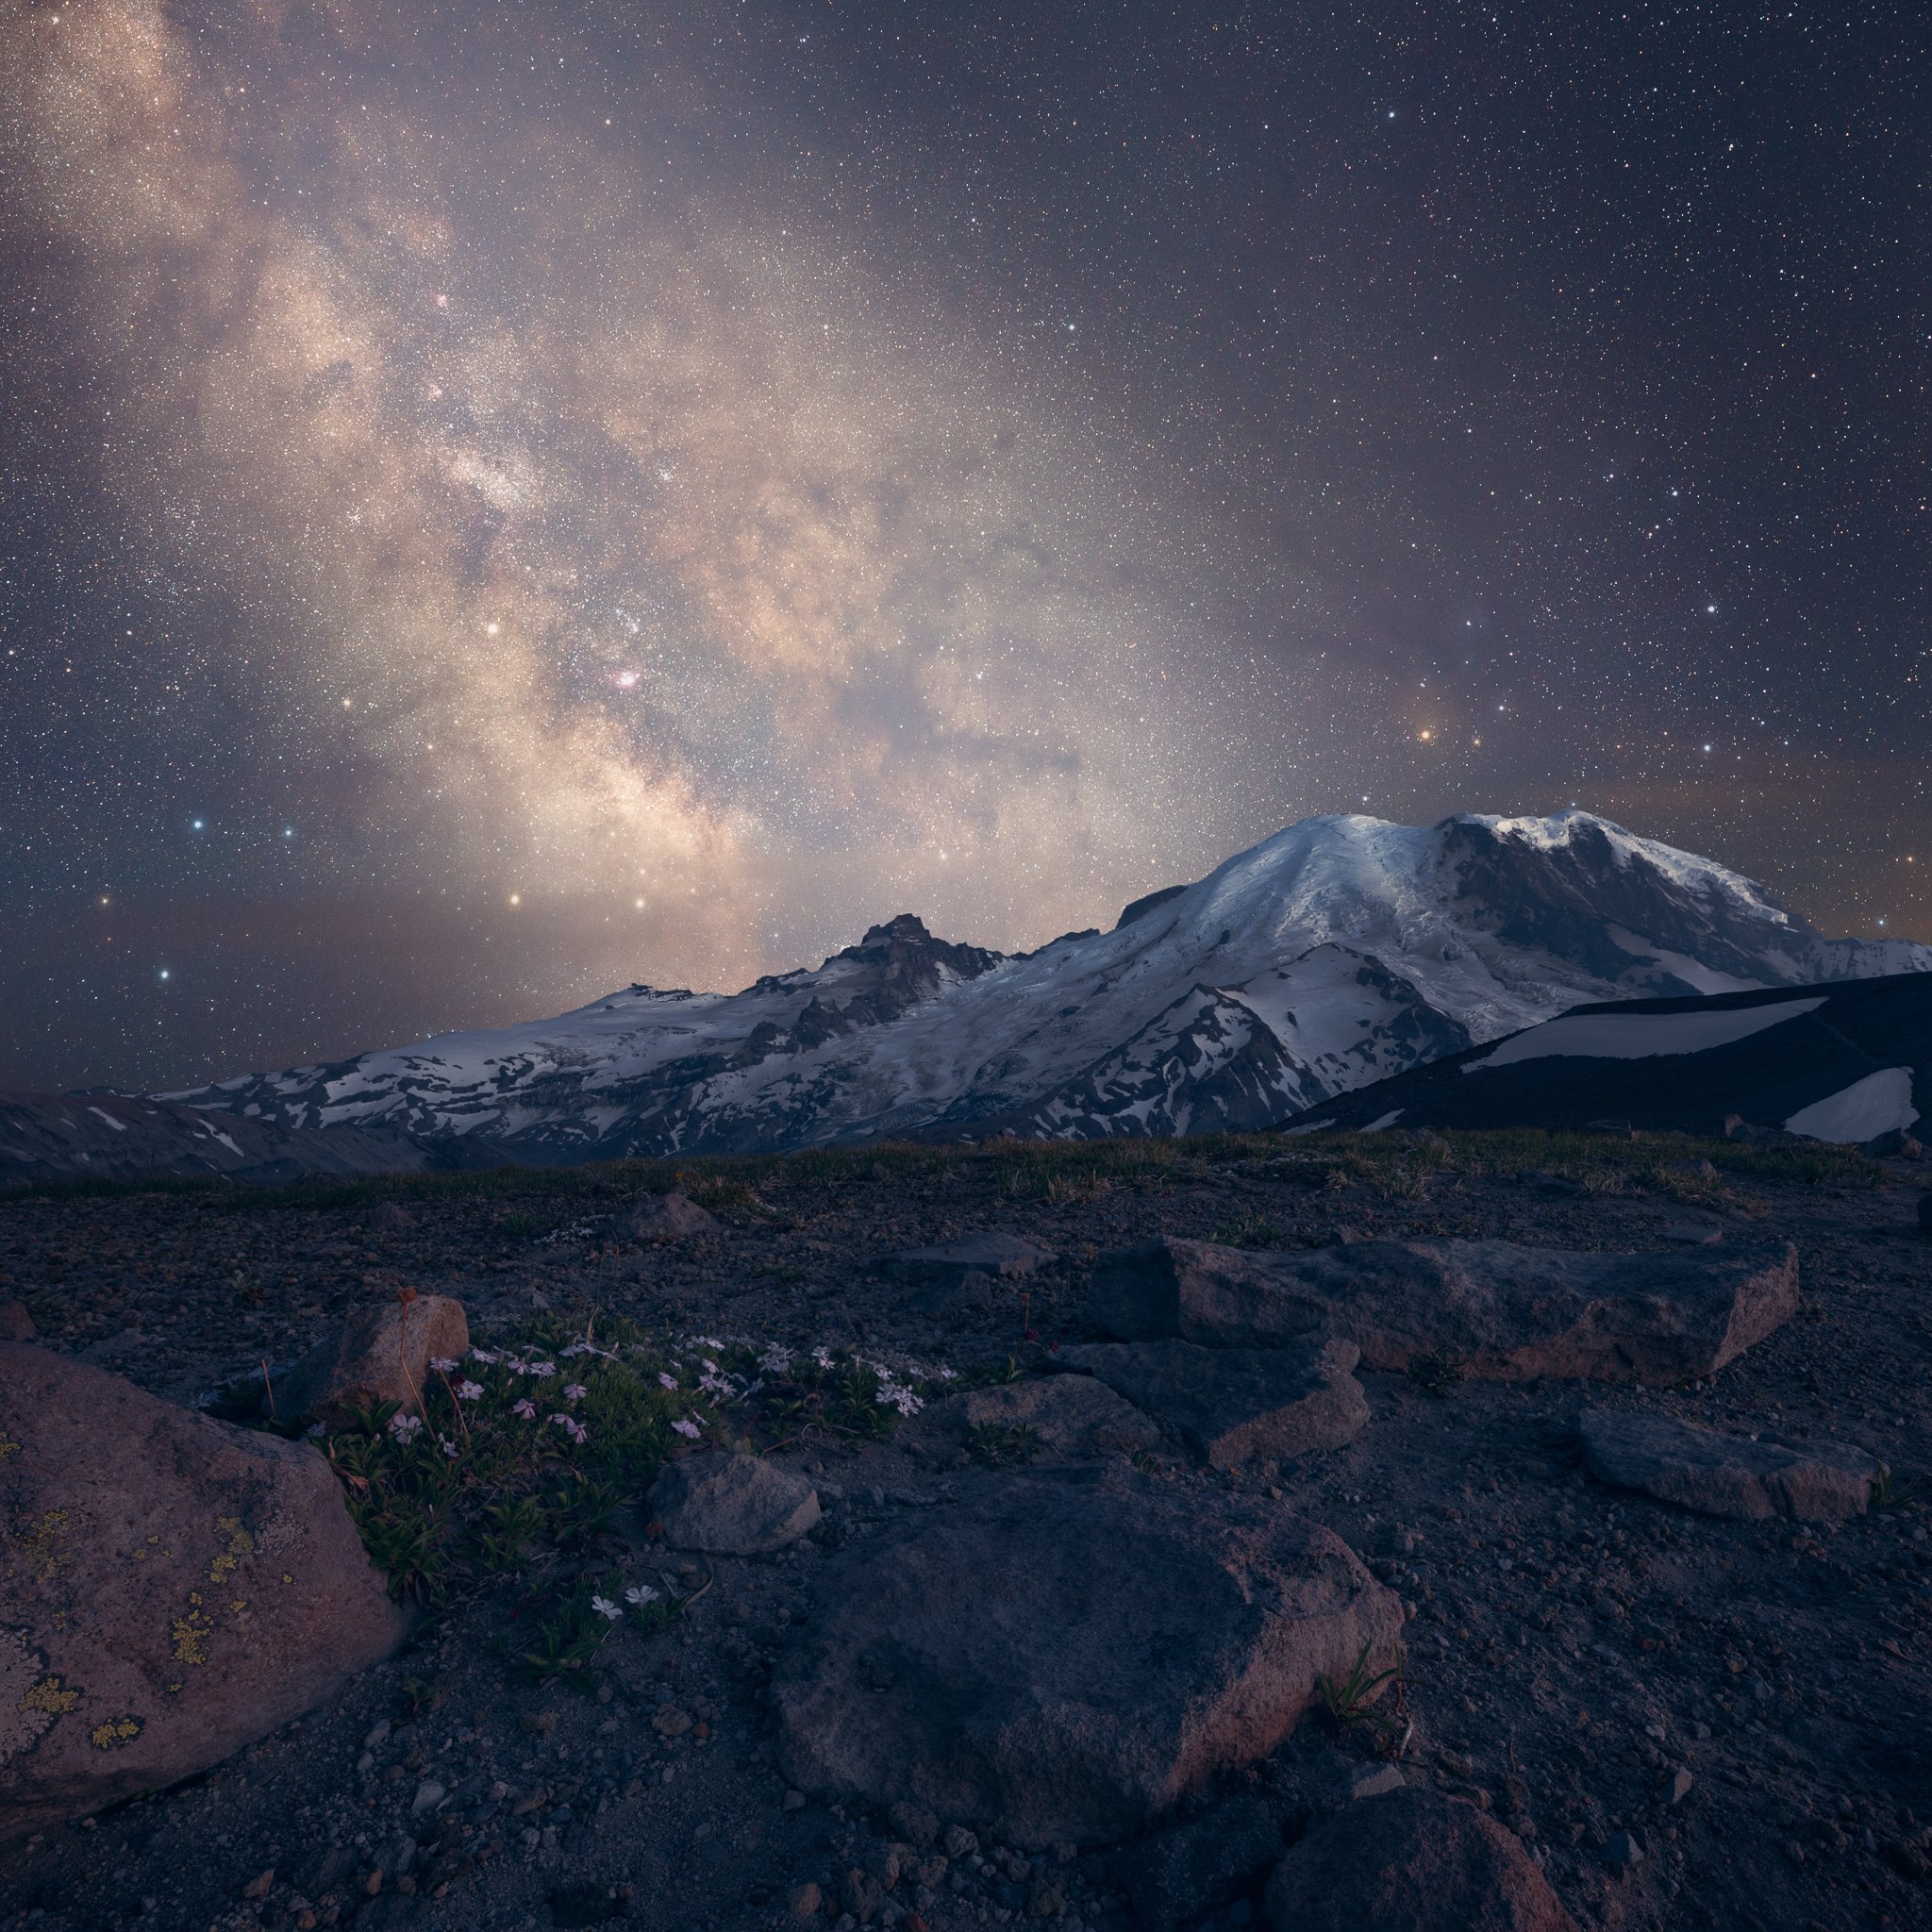
I like how it turned out, but there are some problems. The sky is a little muted for me. I was using a light pollution filter on the track that night, and that resulted in a different exposure than I was used to, and I originally didn’t process it terribly well (I normally boost exposure by 1/2 to a full stop to compensate for this). I also don’t care for the color, as it looks off to me. Speaking of color, the foreground color blend is okay, but I think there’s something slightly off about it. Too much blue I think.
So, to address those shortcomings, I reprocessed the image, and here’s the result:
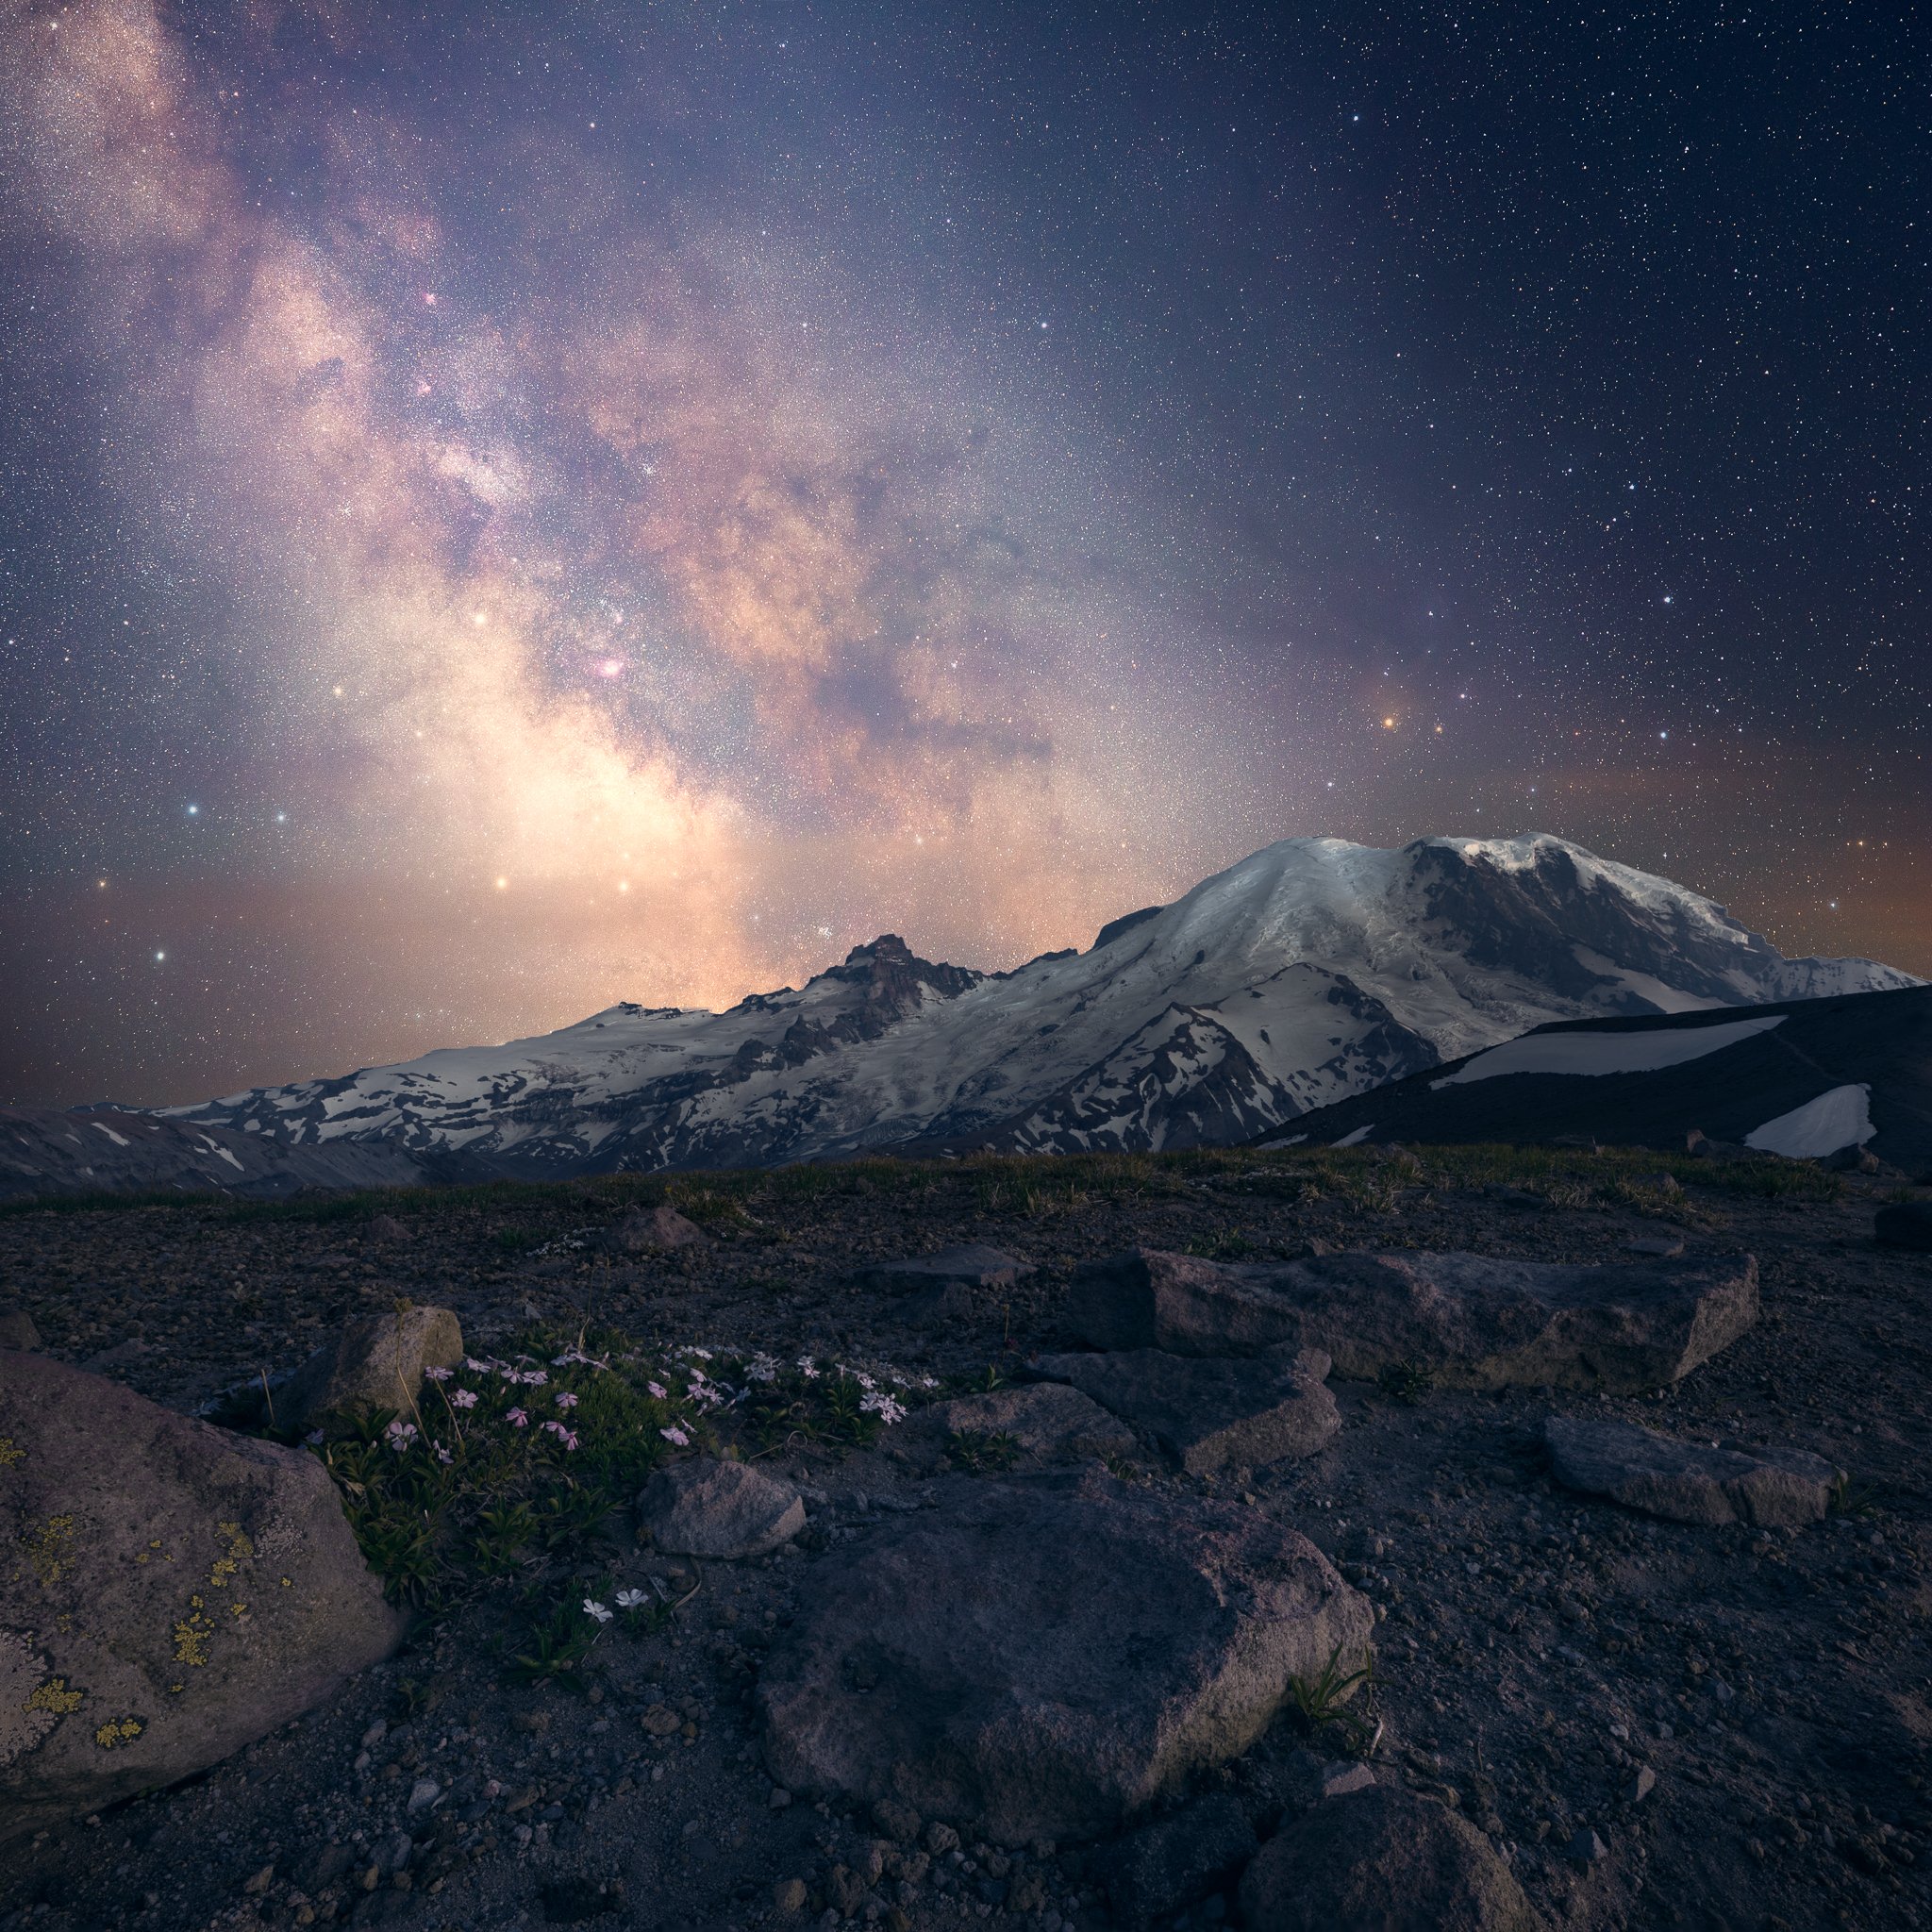
I hope you’ll agree that this is better. The sky is much better exposed as I’ve corrected the exposure. I’ve also corrected the color, and it looks more true to life, at least to my eye. I also redid the color balance between foreground and background and I think it’s a better match. That actually resulted in the image being too blue overall, but I corrected that in post as well and added back some yellow. I decided not to do much star reduction as I liked the bright stars around the Milky Way on that evening and how sharp they came out (I got a really good track that night). I think the image has a nicer, more natural look overall.
Overall, I think there are a couple of takeaways from this:
Shoot in raw! Always always always!
Don’t be afraid to go back and revisit old images and reprocess them with new techniques. As you can see, it can breathe new life into them.
There’s no right way to process an image. Any of the above four images would be fine images, and you might be proud to have them in your portfolio. Post-process for what you like, not what I like or what someone tells you to do.
I had enough fun doing this that I think I might go back and process a few more from the archives. If you enjoyed reading about the process, and want to see more articles like this, shoot me a message and let me know!